Prolific PL2303 Serial Drivers for M1 Mac with Sonoma

As usual, with each update to Mac OS I seem to have trouble locating a working PL2303 Serial to USB drivers for my older technologies… programming radios, Tripp Lite Keyspan High Speed USB to Serial Adapter USA-19HS, serial/USB GPS units, etc.

Some quick notes that I hope will help me (and you?!) in the future:

  • Visit https://www.prolific.com.tw/US/
  • Click Support
  • Log in with guest and guest as username and password
  • At the bottom look for the link: Click here for PL2303 USB to Serial Drivers.
  • Down on that page look for a section similar to: Mac OS X Universal Binary Driver v2.2.2 (PKG file format) [Or whatever version might have been released since this post]

While I would recommend going through the process above just in case newer versions have been released, I am going to include a direct link to the file for quick access:
PL2303HXD_G_Mac Driver_v2.2.2_20221228.pkg

Note: They also show it as available in the Mac App Store here:
https://apps.apple.com/tw/app/pl2303-serial/id1624835354?l=en&mt=12

[Source]

How to order pages for printing in a booklet from Google Docs or a PDF file

When you print a standard document, the page numbers just go in order (1,2,3,4) but if you want to print that same document as a booklet on letter sized paper to a finished size of 5.5″x8.5″ for example, you’ll need to order the pages differently. In this example the page order would be 4,1,2,3, that way when folded up everything would be in the right order.

The official word to describe the above is “Imposition” and some applications, especially tools like Adobe InDesign, can do it for you. But more basic tools like Google Docs, Adobe Acrobat, etc,. don’t build those tools in.

So when I was faced with needing to print a booklet from Google Docs, I exported it as a PDF and then considered just manually ordering all of the pages or dropping them in to Adobe InDesign to manually impose them… but it was a 16-page document and I just didn’t want to waste the time.

I did some searching online and located PDF Snake. They offer a free trial, which is awesome, you can really test it out and prove it is going to do what you wanted. And the free trial does allow you to download the finished product, so it’s not just demo and you don’t have to pay to finish up your project right away. Beyond the trial period it is $12.39/month or $123.90/year… which if you were doing this kind of work daily it might be worth it… but for me, this is the first time I’ve needed to impose a booklet in like 8 years… so honestly, there is no way I would pay those prices for a subscription.

All that to say, if you run in to the problem of needing to print a booklet from Google Docs… this was a quick and easy solution! Again, the steps were:

  • The Google Doc was formatted for 5.5″x8.5″ pages
  • Add additional pages at the end until you end up with an increment of four, so I added an extra page at the end of my book so it was 16 pages
  • Export that doc as a PDF file
  • Drop the PDF in to PDF Snake and choose Booklet
  • On the right column, click the Download arrow to download the final PDF
  • Print it on your printer, fold it in half, and verify everything is awesome!

CHIRP Crashing on Mac M1 Chips

Every time I tried launching CHIRP, the awesome ham radio programming software, on my MacBook Pro with an M1 chip it would crash immediately.

Others had the same problem and there has been an open bug report here for a while. Thankfully there was a solution posted there that got it working again. Thanks to Scott Lopez for that solution!

I keep CHIRP in my primary Applications folder, not the User’s Applications folder, so these instructions work for me with that configuration. Simply open up Terminal and run the following three commands:

xattr -c /Applications/CHIRP.app
xattr -c /Applications/CHIRP.app/Contents
codesign --force --deep --sign - /Applications/CHIRP.app

Once that is done I can launch CHIRP normally. Those commands will need to be repeated after each software update.

So, you want to start a vlog on YouTube?

I’m going to keep this really brief, I’m going to start out with the the super cheap basics to get thing started:

Phone Only Option:

So the phone you currently have is technically all you need to start vlogging, that’s good news, right? 

Some quick details on that… the selfie camera (the camera on the same side as the screen) is 1080 resolution, which is still High Definition (HD) and good enough for vlogging, but the camera on the back is 4K and super high quality. The difficult thing about using that camera is if you are filming by yourself, you can’t see how the shot is framed. If you have someone acting as the camera operator, following you around as you talk about things, then they can see the screen and you can use the higher quality camera.

Step 2: Microphone

So a lot of people don’t know this, or don’t think about it, but audio is actually almost more important than the video on a vlog. If you can year the person talking clearly, people will put up with a bit of lower quality video, loss of focus, shaking footage, etc. But if their is poor audio and you can’t hear the person, nobody will stick around and watch.

Your phone’s microphone is fine, as long as you’re really close to it. But if you back away from the camera 10-feet so they can see you walking or showing something, your audio is really low and won’t sound good… so the first step is to add an external microphone.

To get things started with the lowest possible cost, I’d start with a wired microphone such as this:

Professional Grade Lavalier Microphone with Adapter Compatible with iPhone $39.99

This is a lapel microphone, just like I used in my quick sample video. I selected this one for you since it ends in an 1/8″ audio jack, comes with an extra 6.5 foot extension cord, then has the adapter that will plug directly in to your phone. Others go directly to a phone, but then you wouldn’t be able to add extension cables if you needed them.

The only downside of setups like this… is that you’re always connected by a wire, like a dog on a leash :-)

But it keeps the microphone really close, audio will be consistent from scene to scene, day to day. And it does come with a basic wind muff, so that will help cut down on wind noise outside.

Step 3: Tripod

Nobody wants to watch unstabilized  shaky/bouncy video… so adding a tripod with a phone holder will allow you to set up the shot, get in the frame, and film yourself or show you working on things so you can be hands free. And if someone else is helping operate the camera, they can rotate the tripod to follow you around keeping the footage smooth. 

I’ll say it right away… these tripod are VERY cheap, I’m sure it is almost all plastic and may not last multiple years unless it is cared for very carefully… but to keep your startup cost low… I think these would do the trick and come with the phone holder. The second one even comes with a bluetooth remote you could use to start and stop recording remotely.

UBeesize 50” Phone Tripod Stand, Aluminum Lightweight Tripod for Camera and Phone $14.44

Cell Phone Tripod 55″, Lightweight Aluminum Travel/Camera Tripod Stand with Bluetooth Remote, Carry Bag $23.95

Okay, so that is the basics for hardware to get started. To edit your videos you can just download iMovie for free from the App Store. You can import your clips, trim off the beginnings/ends of the clips, assemble them together in to a timeline, even add some titles/text, and then export them to YouTube.

If you’re going to edit on a computer/laptop, you could also download iMovie from the Mac App Store which is also still free. 

What if you wanted to bring everything up to the next level?

DJI Pocket 2 Creator Combo – 3 Axis Gimbal Stabilizer with 4K Camera, 1/1.7” CMOS, 64MP Photo, Pocket-Sized, ActiveTrack 3.0  $499.00

Yeah, the price is … not cheap. But what does it give you? A 4K Camera with a wireless bluetooth microphone, and full video stabilization so you can walk around with it and it will smooth out the bumps and motion. And what is ActiveTrack 3.0? You can set up the camera on a tripod, and the camera will move to follow you around as you move around and look at different things… no need for that second camera operator if you’re working alone a lot.

Other than that, a nicer tripod would be a good thing… something with some more weight to it so it was more stable/sturdy, wind would affect it less, etc. And mine I end up having a true video tripod head on it so I can smoothly move back and forth, but I also needed that because I’m often filming with a full-sized camera. 

I’ve been waiting for Zoom to release a new microphone that I will use with a lot of my video production work. It is still a Bluetooth enabled microphone and comes with the lapel microphone, but it also comes with some new technology to really control the audio level (loud/soft) better than any microphone that has existed in years due to it’s 32-bit float technology… no more setting audio levels manually!

Zoom F2-BT Ultracompact Bluetooth-Enabled Portable Field Recorder Kit with Lavalier Microphone, Windbuster, and Memory Card $228.43

What else might you want to add to your setup? 

Lighting is really important, shadows and such can really make video not look as good. Here is a great really small light that offers adjustable color temperature (warm/cool light to match the natural lighting in the scene)

Lume Cube Panel Mini | Bicolor Continuous LED Video Light $59.95

You’d have to add on some kind of method to mount the light to the phone or tripod, here is just one of many example holders that could do that:

Ulanzi ST-02S Aluminum Phone Tripod Mount w Cold Shoe Mount $14.95

I could go on and on about options, using full-size “real” cameras, using various different kinds of shotgun or lavaliere microphones, studio lighting setups that are still affordable, as well as a lot of options for editing your videos, I use Adobe Premiere most of the time, but tools like FXhome HitFilm Express is free and can do a TON of really cool stuff, most of which isn’t needed for a simple vlog. 

The simple guide to setting up Winlink and VARA on a Mac via Crossover

There are several method of running Windows software on a Mac, one involves Wine directly, but the easier option I would suggest is spend the money to buy CrossOver for $39.95–$59.95. The more expensive version includes 12 Months of Upgrades and support.

After you’ve got CrossoOver set up, you’ll need to grab some files:

Okay, now you’ve got everything downloaded, let’s get it installed!

  • Launch CrossOver (perform any updates/upgrades it asks for)
  • Create a New Bottle and call it Ham Radio or whatever you prefer
  • I’m going to create it as a Windows 7 (32-bit) bottle since that is the default
  • Install Microsoft .NET 3.5 Service Pack 1. To do so, click Install a Windows Application and start typing the name and select it from the list. After clicking Continue be sure to select your new Ham Radio bottle otherwise it will install it in a new empty bottle.
  • In the same way, also install Microsoft Visual Basic 6 Runtime Service Pack 6 in the same bottle
  • Install Microsoft Visual C++ 2015 (14.0) Redistributable
  • Install Microsoft XML Parser (MSXML) 6.0 SP2 (for unknown reasons…optional?)
  • Click Install a Windows Application then Select an Installer and select your Winlink Express zip file.
  • Select your Ham Radio Bottle and under Select Application it is safe to just select Unlisted Application. Hit Continue and Install to start the installation.
  • Using those same steps, install VARA FM and/or VARA HF in to the same bottle.
  • Unzip the VARA Components file and copy the contents of the Put_in_System32 folder to the following location:
  • /Users/[user name]/Library/Application\ Support/CrossOver/Bottles/[bottle name]/drive_c/windows/system32 and when it asks, overwrite any of the existing files with these new ones.

You should now have the Winlink Express icon in the bottle, along with VARA FM and/or VARA. You’ll want to open Winlink Express and set up your preferences (callsign, password, email, grid square, etc.) Also, install any updates/upgrades Winklink Express offers on each launch.

TESTING: Getting WinLink Forms to work:

I went to the Chrome Download page which of course defaulted to my host Operating System (Mac) but I wanted the Windows installer. Scroll to the bottom and open the Chrome Family tab and choose Other Platforms. There you will find the Windows installers. Since my CrossOver Bottle was Windows 7 (32-bit) I chose that installer.

I then installed it to my Winlink bottle in Crossover. Visual C++ gave me lot of errors and I just kept clicking Abort on them.

I ran the installer a second time and it still didn’t work (but no errors this time) so I switched over to trying Firefox. I went to their alternate downloads page and grabbed the 32-bit Windows installer. In the list of pre-built installers Firefox 45 was the highest version, so I selected that hoping it would add any dependencies needed, but I still selected the latest (91.0.2) version of the installer that I had downloaded.

The Crossover installer complained that Firefox 45 hadn’t installed, so I skipped that step, but launching Firefox worked without a problem! I still would have rather used Chrome, but this might work.

Firefox runs, but attempting to use a Winlink Form still doesn’t open in the browser.

Fixing Dropped Bluetooth Audio on Mac OS Catalina

Update:

So it turns out, the actual problem was that my headset was paired to both my iPhone and my computer. After doing all of the below and having it working perfectly, to troubleshoot further I reconnected the headset to my phone and the computer audio started skipping again.

I disconnected the headset from the phone (but didn’t Forget it) and it kept skipping. So then I turned of Bluetooth on the phone and the skipping stopped.

So the moral of the story? On the phone under Bluetooth, Forget the headset from the phone and only have it connect to the computer alone… no more skipping.


At some point after upgrading to Catalina I noticed my bluetooth headset kept dropping audio, several times a minute. I haven’t narrowed down the exact cause of the issue, but I was able to resolve it, so that is good enough for me!

Here are some steps that I took, and some potential causes, let me know if any of it works for you:

Reset the Bluetooth Module

There is a Bluetooth icon typically located near the clock at the upper right of the Mac desktop. Users typically use this to view their connected devices, check battery levels on them, and connect/disconnect devices. Nothing new there.

And a bit more advanced users know that if you hold down option and then click on the Bluetooth icon, you’ll see some additional details and options up there: The Bluetooth version, address, and if you click on the individual connected devices you can see their signal strength and more details about them. Nice, but nothing helpful for this issue.

Here is a trick I don’t think I was aware of, if you hold Shift-Option and then click on the Bluetooth icon, you get even more options, including a Debug menu item.

What you’ll want to do is click on the Debug option then choose Reset the Bluetooth module. After that you’ll want to restart.

That alone didn’t fix it for me, so I went on to…

Delete the com.apple.Bluetooth.plist File

This article gave me the basic instructions for doing this, here are my shorter version of those instructions:

  • From Finder click Shift-Command G which is the same as going to the Go menu and selecting Go to Folder
  • In that box enter /Library/Preferences (note that is different than the individual Users’s preferences which are located at ~/Library/Preferences)
  • Look through that list of files and find com.apple.Bluetooth.plist. You can delete the file, or just because I’m a cautious one, I dragged it to my desktop.

After doing that you’ll want to reboot again. On that reboot, I took the opportunity to do one additional step…

Reset the PRAM

PRAM or Parameter Random Accessory Memory stores some of the settings for your computer, so you’ll lose a few preferences such as if changing volume should play a sound, etc. Typically it is nothing major and I have rarely, if ever, had problems with a PRAM reset.

Go ahead and click to restart your computer, but before the grey screen appears press and hold the CommandOptionP, and R keys all at the same time.

Keep holding them down until you hear the startup chime at least 2-3 times. Then release them and let the computer start normally.

Re-connect your Bluetooth device and see if the problem is resolved!

One other option…

I’ll confess I did one other thing while the computer was restarting that may have had an impact on things, so I’ll mention it here. My headset was also paired to my phone, so I went ahead and had my phone forget the headset and turned off Bluetooth completely on it temporarily.

But either way, my audio hasn’t dropped out even once during the entire time it took me to write this post, so I’m going to consider the problem solved!

Let me know if it works for you, or try just unpairing your headset from your phone if yours was paired to both devices… or just try a PRAM reset without any of the other steps.

KI6ESH/AG … finally.

Upgrade to General Class
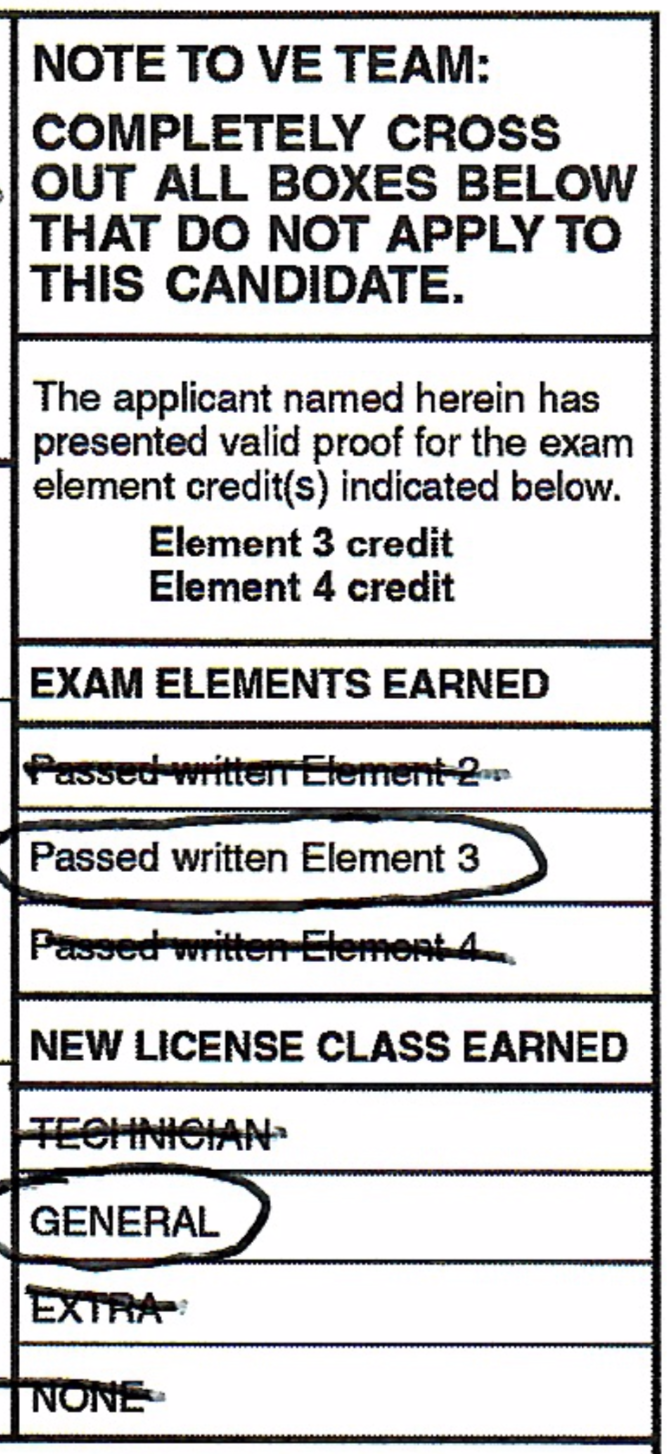
I tested for my original Technician class exam on July 15, 2006, and always expected I would upgrade to General or Extra at some point. I used my Technician quite a bit in the Santa Cruz area, checking in to weekly nets, playing around with APRS and some digital modes on 2-meters, doing some emergency communications when needs arose for Santa Cruz County, etc.

Over the years, I have spent less time on the radio, especially since moving to Bend, Oregon, which just seems a lot quieter and slower pace on the radio. But over the past couple of months, I decided it was time to upgrade to General so I could access additional frequencies and began the studying process.

I scheduled my exam to give me a target to aim for, and today I headed down to the library and met up with a group of people all taking their exams, many Technicians, two General upgrades, and one person testing for the Extra as a “practice test.”

Well, the studying paid off and I am finally a General. My goal was to finally be able to start doing some more learning and using of HF bands, allowing longer distance communications without the need for local infrastructure such as repeaters.

The thought is always that when “the big one” comes, be it the Cascadia Subduction Zone earthquake here in the Pacific Northwest, or the San Andreas or Hayward fault down in California, that amateur radio will always be there for communications. One of the topics that comes up is, “Who’s engineering do you trust more? AT&T, Verizon and T-Mobile, or a ham radio repeater on a mountain top held together with duct tape and baling wire?”

Either way, now I have the option of a third communications mode: If cell phones AND local repeaters go down, I will have the option of jumping over to HF!

I look forward to working with the various digital modes and especially in testing Near Vertical Incidence Skywave propagation which gives a communications range of 0–400 miles. So we’ll see what I do next!

I wanted to thank Joe Barry, K7SQ, Barbara Pace, K7RVW, and Loren Rasmussen, K7CWQ for taking the time out of their day regularly to be Volunteer Examiners (VE) and offer these exams for those seeking initial licenses or upgrades…thank you!

I also wanted to thank Dan Romanchik, KB6NU, for his excellent No-Nonsense Study Guides which were a huge help to me in my studying, along with the practice tests I took from a variety of sources.

And most of all I want to thank the two people who first really introduced me to amateur radio. Both of them are now silent keys, but their legacy lives on. Dan White, KB6TDW (SK) and Dick Mack, W6PGL (SK) both did a great job of showing me what could be accomplished with amateur radio and made me want to pursue it.

Is Extra in my future? Potentially… I’ll take a few practice exams, likely buy Dan’s Extra Class book, and see what happens :-) The jump to General opens up many frequencies and bands for me, I probably won’t feel too left out if I can’t access the additional Extra class frequencies.

Connecting the Kenwood TH-D7 to MacMemories Manager in Yosemite

It had been enough years since I’d used my Kenwood TH-D7 that I couldn’t remember how to get it to connect to my MacBookPro.  Mostly for my own reference, and possibly to assist others, I’ll post my quick notes here.

  • I used my Keyspan USA-19HS USB to Serial Adapter along with a Kenwood PG-4W programming cable.
  • Of course I needed to install some drivers to get the PL2303 Serial Driver to work in Mac OS X Yosemite, and the original project I used to use is still there and had the source for free, but you had to pay for the download. I did eventually find a download link to the Keyspan USA-19HS driver (here is the direct file link)
    2023 Note: For newer M1 MacBook Pros running Sonoma and needing a Prolific PL2303 Serial Driver, it looks like this works: Prolific V.2.2.2 
  • Next I just plugged in the Keyspan device, plug the radio in to it, and turn the radio on.
  • Launch MacMemoriesManager and selected the Radio Kenwood TH-D7 and for Port selected USA19H143P1.1. It immediately connected and I could download all of the frequencies from the radio.

Awesome :-)