Update:
So it turns out, the actual problem was that my headset was paired to both my iPhone and my computer. After doing all of the below and having it working perfectly, to troubleshoot further I reconnected the headset to my phone and the computer audio started skipping again.
I disconnected the headset from the phone (but didn’t Forget it) and it kept skipping. So then I turned of Bluetooth on the phone and the skipping stopped.
So the moral of the story? On the phone under Bluetooth, Forget the headset from the phone and only have it connect to the computer alone… no more skipping.
At some point after upgrading to Catalina I noticed my bluetooth headset kept dropping audio, several times a minute. I haven’t narrowed down the exact cause of the issue, but I was able to resolve it, so that is good enough for me!
Here are some steps that I took, and some potential causes, let me know if any of it works for you:
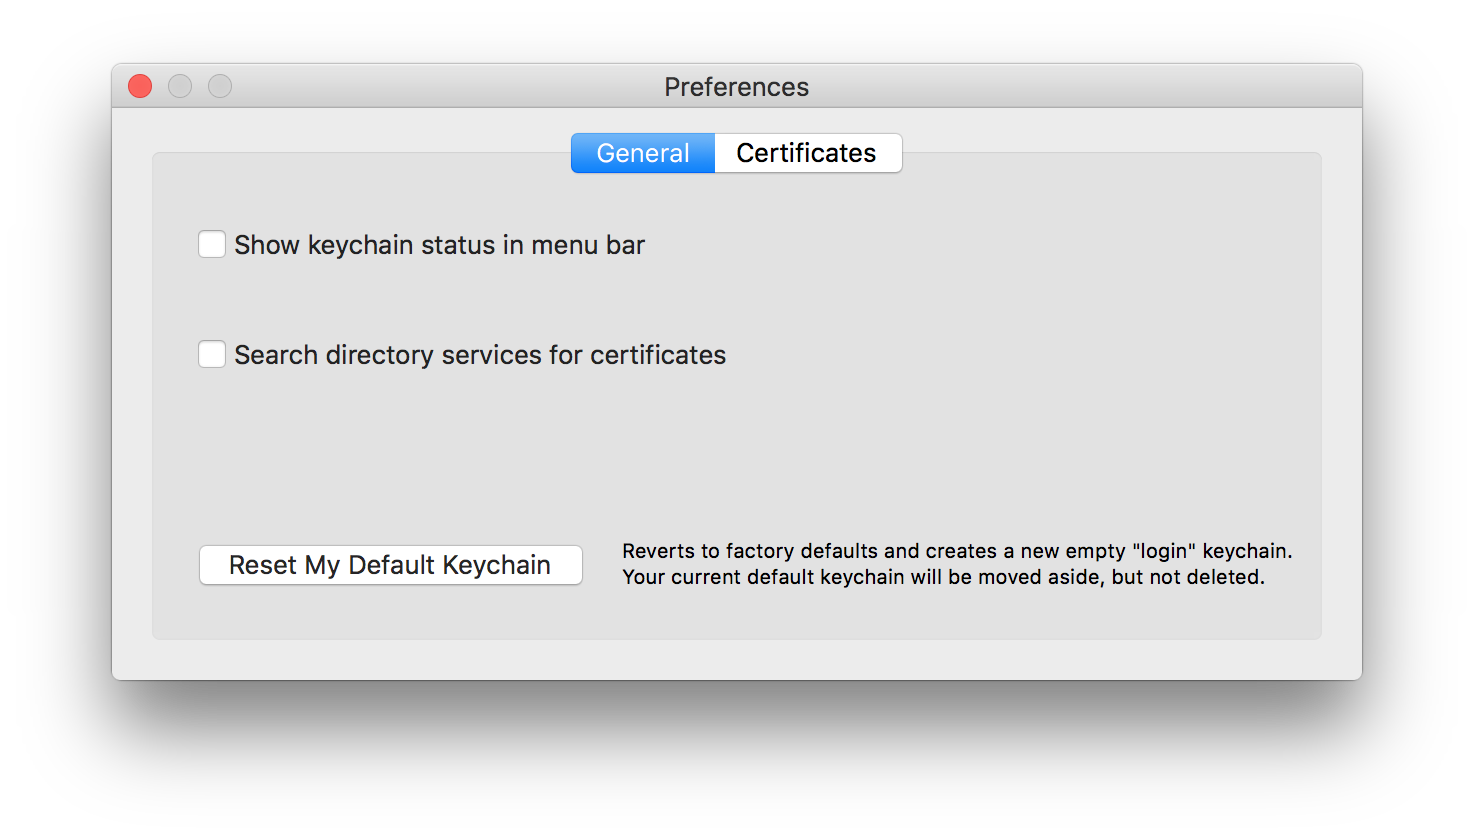
Reset the Bluetooth Module
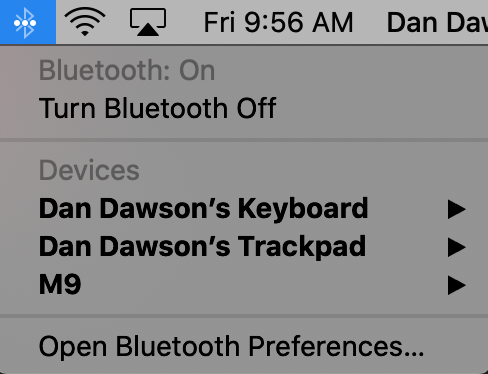
There is a Bluetooth icon typically located near the clock at the upper right of the Mac desktop. Users typically use this to view their connected devices, check battery levels on them, and connect/disconnect devices. Nothing new there.
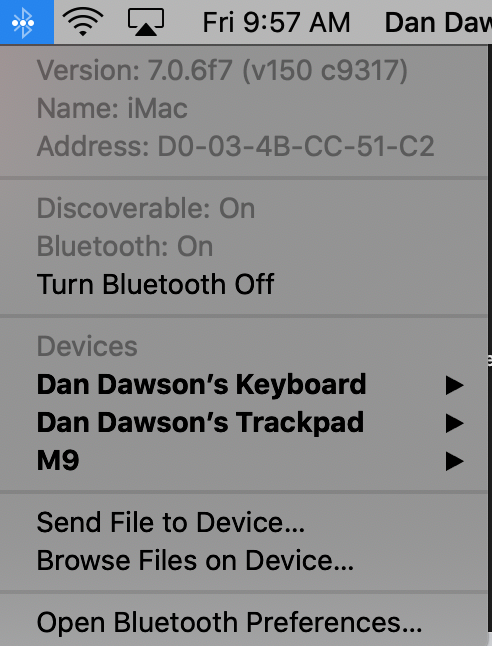
And a bit more advanced users know that if you hold down option and then click on the Bluetooth icon, you’ll see some additional details and options up there: The Bluetooth version, address, and if you click on the individual connected devices you can see their signal strength and more details about them. Nice, but nothing helpful for this issue.
Here is a trick I don’t think I was aware of, if you hold Shift-Option and then click on the Bluetooth icon, you get even more options, including a Debug menu item.
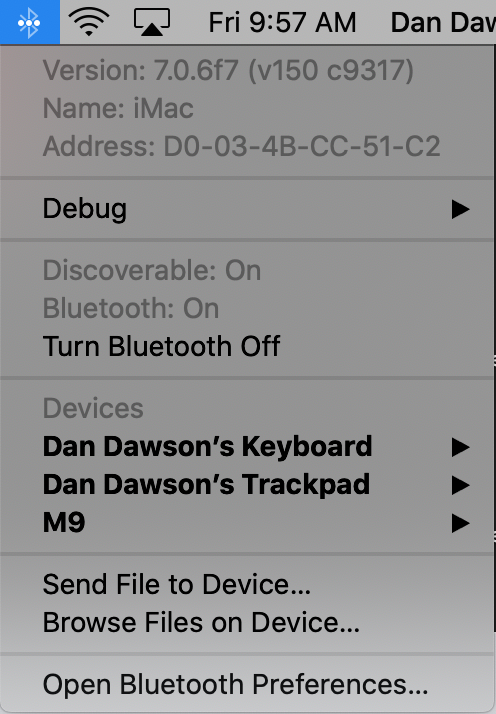
What you’ll want to do is click on the Debug option then choose Reset the Bluetooth module. After that you’ll want to restart.
That alone didn’t fix it for me, so I went on to…
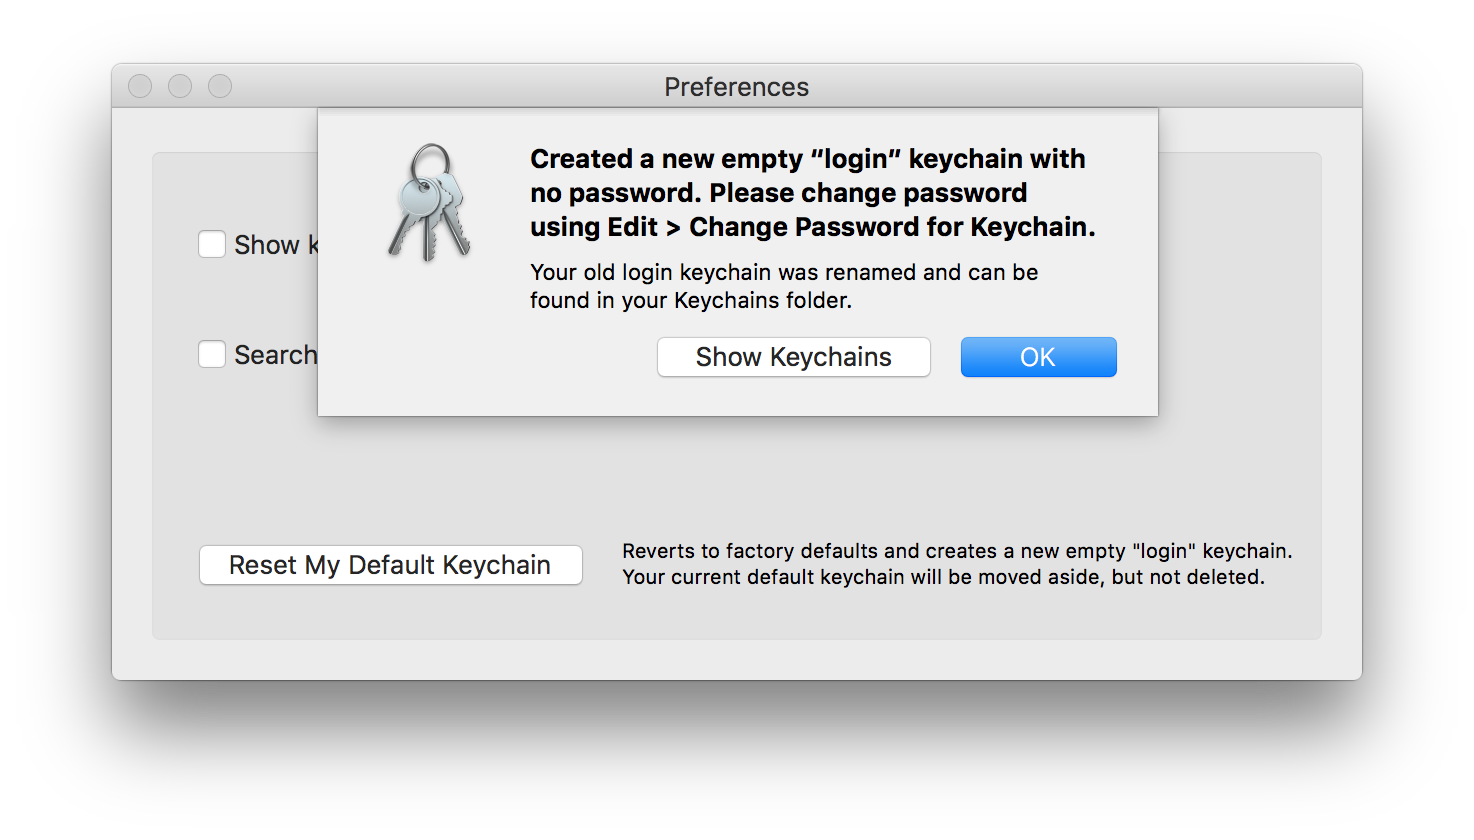
Delete the com.apple.Bluetooth.plist File
This article gave me the basic instructions for doing this, here are my shorter version of those instructions:
- From Finder click Shift-Command G which is the same as going to the Go menu and selecting Go to Folder
- In that box enter /Library/Preferences (note that is different than the individual Users’s preferences which are located at ~/Library/Preferences)
- Look through that list of files and find com.apple.Bluetooth.plist. You can delete the file, or just because I’m a cautious one, I dragged it to my desktop.
After doing that you’ll want to reboot again. On that reboot, I took the opportunity to do one additional step…
Reset the PRAM
PRAM or Parameter Random Accessory Memory stores some of the settings for your computer, so you’ll lose a few preferences such as if changing volume should play a sound, etc. Typically it is nothing major and I have rarely, if ever, had problems with a PRAM reset.
Go ahead and click to restart your computer, but before the grey screen appears press and hold the Command, Option, P, and R keys all at the same time.
Keep holding them down until you hear the startup chime at least 2-3 times. Then release them and let the computer start normally.
Re-connect your Bluetooth device and see if the problem is resolved!
One other option…
I’ll confess I did one other thing while the computer was restarting that may have had an impact on things, so I’ll mention it here. My headset was also paired to my phone, so I went ahead and had my phone forget the headset and turned off Bluetooth completely on it temporarily.
But either way, my audio hasn’t dropped out even once during the entire time it took me to write this post, so I’m going to consider the problem solved!
Let me know if it works for you, or try just unpairing your headset from your phone if yours was paired to both devices… or just try a PRAM reset without any of the other steps.
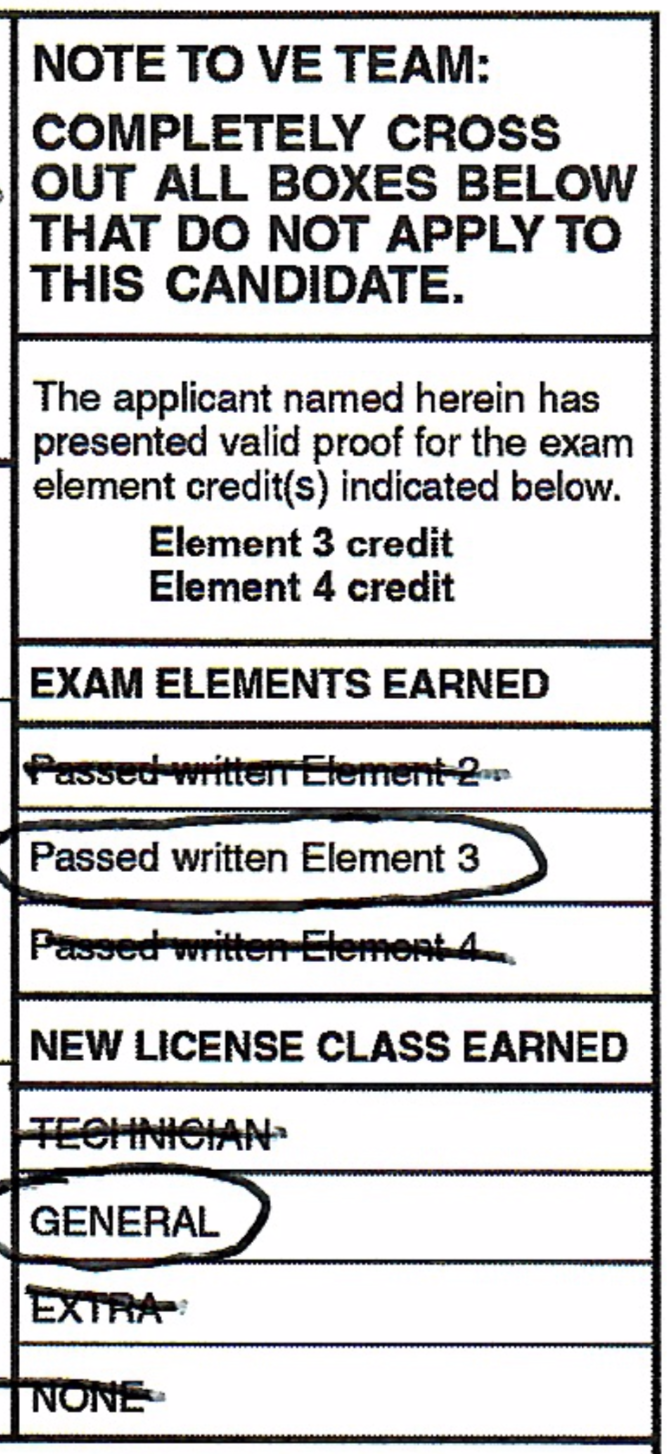 I tested for my original Technician class exam on July 15, 2006, and always expected I would upgrade to General or Extra at some point. I used my Technician quite a bit in the Santa Cruz area, checking in to weekly nets, playing around with

 But this was the point I realized I could not adjust the volume with my keyboards volume keys and if I remember right, I wasn’t even hearing anything. Of course from my old experiences this is where I would jump to Soundflowerbed and check my settings, verify my inputs and outputs, etc. But where is Soundflowerbed?! It’s gone! Usually it was in /Applications/Soundflower/Soundflowerbed but it was nowhere to be found.
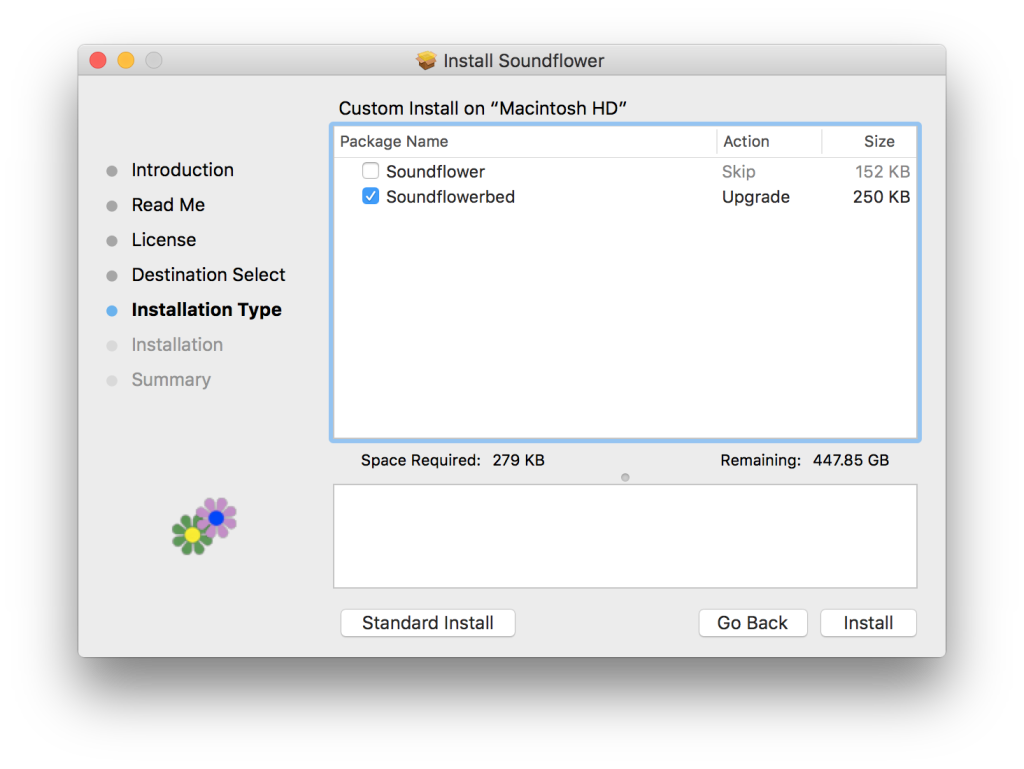
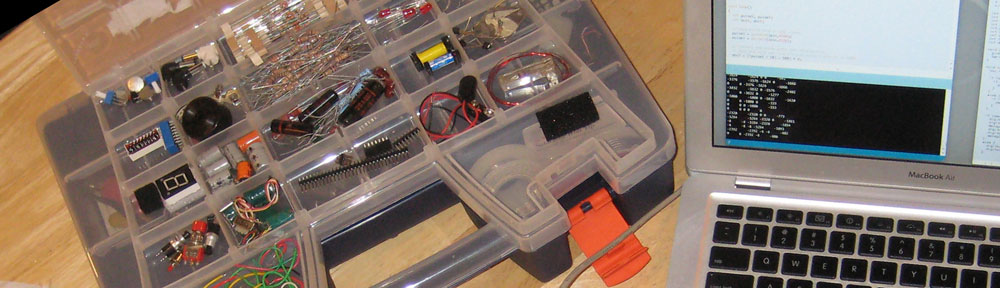
 I started back up on one of the last projects I had worked on. Having lived in California most of my life, earthquakes were always on my mind, so the idea of having an early warning network in the state was always something of interested to me. Similar to the promises of an inexpensive