Complexity in setting up APRS iGates… necessary?

Pardon my complaining attitude in this post, but maybe there are good reasons. So the basic story is some of us use APRS transmitters to track our location as we move around (be it hiking, biking, sailing, in the car or in a plane). For some of us, our goal is to be picked up by the mapping services online so other people can see our track or present location on a map.

The path for that position date typically is from our APRS transmitter, over the air to a digipeater or two that repeat the signal until it his something known as an iGate. Basically an iGate at it’ simplest is set up as:

* A receiving radio (any scanner or ham radio will do)
* A computer with a sound card
* Software that receives the sound from the radio and converts it to aprs text
* Software that takes the text of the APRS stream, filters it, and send it to the APRS-IS stream on the internet

Once your data makes it to the internet stream, it can be mapped, archived, or used however you like. The problem is, a lot of APRS packets are lost before they ever reach the internet, there are simply not enough iGates in some areas to pick up the packets. With that being the problem, I wanted to build up a simple iGate and be able to gate local packets down in the valleys in which I live out to the internet. Should be easy… I’ve got computers with sound cards, I’ve got radios and scanners… but then it comes to the software.

Almost every time I have gone looking for good software to use it turns in to a crazy story of needing to install linux, install Windows XP, read a mountain of documentation, chat on forums for days attempting to work out the configuration files, etc. I wonder why it has to be so difficult?

Has there ever been on off the shelf self-contained hardware APRS iGate with a web interface for configuration? Would their be a demand for it?

It seems to me it shouldn’t have to be that difficult…

* A radio receiver
* A TNC
* A webserver to run the iGate software (Ruby?) and allow configuration
* The iGate software to filter dupes, run user defined rules, and send it to APRS-IS
* An ethernet or WiFi network interface to give it internet access.

What might it look like? I’d envision something like the SheevaPlug computer with an audio line in jack, or a USB TNC.

sheevaplug_product_shot

Or perhaps it would be built from even smaller component elements:

* Gumstix Motherboard with Wifi or Ethernet
* A tunable radio receiver and TNC similar to the Micro-Trak products, doesn’t need to be a transceiver unless you wanted to build in traditional digipeater functionality

How would it all work? You’d receive the device, power it on, connect to it via the internet, put in your callsign, and by default, it would start gating received packets on 144.39 to the internet. Done.

For more advanced features, you’d simply pull up the configuration file that would have various user defined settings, each with a good description of the possible settings and how they work. (Filter out specific types of packets, change the receive frequency, setting the iGate’s lat/long position, changing the APRS-IS server locations, etc.

Perhaps the existing systems are good enough, but it just seems like there should be some “plug-and-play” style iGates out there to encourage people to set them up so our packets could get received in more locations.

Mac OS X Problems & Solutions: No Route to Host

Though not radio related, I wanted to share this recent discovery of mine since the solution took me a bit of work to discover, and I hope this might help others stuck in the same situation.

One of my laptops recently was unable to access specific URL’s of a very few sites. I believe my desktop machine previously had the same problem but with different URL’s.

I would type in the URL of the page and it would fail to access it, tried it in Firefox and in Safari with the same result… no page loading.

Next I tried to ping the URL and ended up with:

ping: sendto: No Route to host

Picture 1

I did a bunch of forum searching and wasn’t able to find much (people recommended flushing the DNS cache with:

dscacheutil -flushcache

Which I tried and had no luck. I also checked my .hosts file and there was nothing related there. So I searched again tonight and found the solution in several posts!

The problem was an application called PeerGuardian which is an utility that is often used when people download Torrents. What it does is block ranges of IP addresses that are thought to be “bad” ranges in terms of Torrents. I won’t go in to the details of why people use it, but once it’s been used, even when the application is not running, some of it’s filters remain in place preventing access to websites on it’s block list.

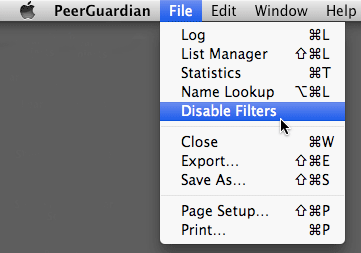
To remedy the situation, I launched PeerGuardian, selected the “File” drop-down menu, then chose “Disable Filters” and instantly my access to those websites was restored. Hope that helps anyone else having the same problem!

capture

Communications Emergency: April 9, 2009

For those interested in hearing about the Santa Cruz ARES Ham Radio response to this week’s communications outage in Santa Cruz, San Benito and Santa Cruz Counties. The cause of the outage were multiple cuts in the Fiber Optic cables which ended up shutting down almost all land line telephone, cellular and internet connections in most areas of the three counties listed above. This brought down our 911 dispatch system, hospital to hospital communications, ATM and Credit Card transactions. Comcast was the only provider I’m aware of who’s telephone, cable TV and internet stayed up throughout the event.

I noticed I had no cellular phone service around 0645 hours local, but still had internet (wifi via Comcast) so figured it was a local problem. Around 0745 hours Ellen got ahold of me via our Comcast landline as she was just finishing her shift at the hospital and let me know it was county wide. I turned on the radios and checked in to the Resource Net letting them know I would be available after 1000 hours. I monitored both nets as I drove to Watsonville to meet her.

When Ellen and I had finished up our first baby appointment in Watsonville (Yay! Babies!! She was 6 & 2/7ths weeks on Thursday we learned from our first ultrasound.) I went back home with her, packed my gear, and checked back in to the Resource Net at 1030 hours. Went to the office, set up a quick antenna outside and brought my radio in to the office figuring it might be hours before I was needed. About five minutes later they called me up and requested me at Sutter Maternity and Surgery Center.

I was at Sutter from approximately 1130-1645 hours and was quickly joined by two other volunteers: Kent, AB6KB, and later Barry, KI6QWQ. Mostly we monitored the events going on between the other served agencies and gave information to hospital staff. We were able to pass their large food order via radio to Monterey, where they still had phone service and they relayed the order to the vendor. We were preparing to place an order for their pharmacy as well but they were able to place that via another method.

My primary setup was my Yaesu FT-817nd with the antenna lead heading out a propped open door, I raised my 20′ fiberglass Jackite pole with my Larsen antenna that I usually use mag mounted on my car up on top of it. I also used my Kenwood TH-F6A for monitoring other frequencies (police, fire, and news media). My 5 watts hit all of the necessary repeaters with no problem, if I’d needed more power I had my 35-watt Mirage amplifier and a DieHard Portable Power 750 12-volt power source in the car.

The event taught me a lot about what pack in my “Go Kit” and that I really do need to build up a better collection of things that are ready to go on a shorter notice… I spent time around the house taking down an antenna, gathering antenna cable, extension cords, my battery backup, my antenna mast and mount, etc. I should really have a kit ready to go, even if it requires me to purchase a few duplicate items (antenna cable ready to go instead climbing through my attic taking down my current setup for example)

Here is a summary provided to the Santa Cruz ARES mailing list by Cap Pennell, KE6AFE:
Continue reading

Yaesu FT-817ND with MacMemoriesManager

I had been playing with my Yaesu FT-817ND for a while, but not really using it very much on VHF/UHF, primarily because I hadn’t programmed very many of the local repeaters in to it.  As with any radio, I really dislike programming a lot of memories in to them via their on device programming methods (tiny buttons, little knobs, one digit at a time, etc)

On my Mac, for my Kenwood radios I have been a very happy customer of MacMemoriesManager for a number of years. “What?” you say? A Mac?  I thought this guy was a ham radio operator?  We all know Hams use Windows (preferably Windows 3.1 or Windows 98 right?) or Linux!

Well, the Macintosh platform is continuing (although slowly) to grow for amateur radio, I really thank those Mac developers, I know they would sell more software if they sold to the larger community, but with the high quality designs Apple has been putting out over the last few years, more and more hams will be switching, especially as quality software is available for them.

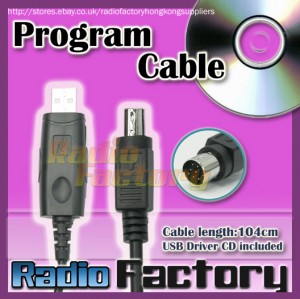
Okay, enough of me praising Apple, back to what I was talking about.  So I wanted to start programming frequencies to the FT-817, so I headed over to eBay and found a USB data  cable for it from 409Shop.com who goes by the name RadioFactory on eBay.

ft-817_usb_cable

I received the cable and a small cd with drivers on it. I never opened the driver CD as I’m sure it was Windows only, and those tiny CD’s won’t work safely in slot loading cd players I don’t think. Didn’t need it anyways, I already had my USB driver installed since I use similar cables for my Kenwood radios.

These cables use the pl2303 Serial to USB chip, and that led me to the SourceForge project: PL2303 USB to Serial Driver for Mac OS X. I have noticed that Apple has a link to that same SourceForge project as well.

  • 2023 Note: For newer M1 MacBook Pros running Sonoma and needing a Prolific PL2303 Serial Driver, it looks like this works: Prolific V.2.2.2

So I connected up the radio and the cable and fired up MacMemoriesManager… and nothing happened. I’ve been consistently frustrated by the 817 since it seems so foreign to the way the Kenwoods work… somehow the Kenwoods just make more sense to me. As I use the 817 more I’m sure I will get used to it.  But here were the major hurdles I was experiencing while trying to load memories:

First, it kept saying the radio couldn’t be found. Apparently the radio has to be in VFO mode, not memory mode to be programmed.

Second, I got it to connect, but only about one in five of the memory channels would get programmed successfully, garbage data was being written to the file, sounded like a baud rate issue.  I reduced the baud rate to 4800 in MacMemoriesManager, and also reduced the rate on the radio and data started flowing perfectly!

To change the baud rate on the radio, turn the radio on, push and hold the “F” key, navigate to menu item 14 using the SEL knob, then choose 4800 for the rate, then push “F” again to get back to your regular modes.

One of the things I really like about using MacMemoriesManager is that since I already had all of my frequencies programmed for the Kenwoods, I was able to open up that memory file, switch the radio to use in the software, and then send those frequencies right back in to the 817 so frequencies can match across all three of my radios and I never had to type them back in again.

Only downside was… the 817 doesn’t receive 220 MHz, and won’t receive the fire department frequencies I use most often, so I had to delete all of the frequencies from the memories that were outside the receiving range of the 817. A wider band receive sure would have been nice for this, I guess I’m just spoiled by my Kenwood TH-F6A!

Learning Morse Code

It probably started when I was around 7-10 years old… I had a neighbor who lived down the street and our cheap walkie-talkies just couldn’t reach but we devised the plan that if we could just learn morse code we could use our flashlights to communicate.  The only problem was… learning morse code!

My desire to learn it died down until around High School when I first started learning about amateur radio from my electronics teacher Dan White (KB6TDW, silent key) and first started studying for my Technician when it went to no code.  I studied for a while but never took the test and didn’t come back to amateur radio until 2006 when I finally studied, passed the test and got my Technician.  But the desire to still learn code was still there.

I wanted to mention here a few of the tools and applications that have been helpful to me as I worked on learning code. Obviously some of these are quite old and I doubt many of you are running Palm anymore, but they were a part of my journey along the way.

PilotMorse: [Windows] The primary application that taught me the letters. I just wish it had adjustable speed.

Smart Morse: [Palm] Used it to practice learning the letters.

Morse-it: [iPhone] Allows you to practice receiving, or sending via tapping.

There are a lot of guides online about learning code, and though I have all the numbers and letters down, I still don’t feel confident that I “know” morse code since I haven’t worked hard on receiving audio and writing it down… I spent a lot of my time learning by sending via Morse-it… figure if I can learn to send I can probably pick up receiving quickly.

My one tip would be to NOT learn by memorizing each letter individually, and don’t learn the code at a slow speed.  Tune up your tutoring application to have it send the letters quickly, even if there are large time spaces between the letters so you can write them down.  But I keep hearing that if you learn the letters really slow, or by having to do a mental lookup of each letter as you hear it, you’ll be stuck in the 5-10 words per minute range and never be able to progress higher.  I think a goal for me would be in the 15-20 words per minute range, but alas, I have no radio to send or receive code on the HF bands, so I don’t even know what the “real world” code speeds are to be useful.

I still have a lot more work to do in geting my sending and receiving speed faster. Since I got my Yaesu FT-817ND for Christmas I’ve been monitoring more HF and finally being able to hear real-world morse code in use.  I’ve been “cheating” quite a bit by using the free Mac OS X application CocoaModem to decode the code for me. I’ve been using that application for decoding PSK, so I pretty much have it running all the time anyways.  I still think I have a goal of 15-17 wpm of sending and receiving without the aid of a computer… we’ll see what happens from there :-)  Practicing with my DinKey has been a huge help and allows me to send much faster.

My first step in to HF: The Yaesu FT-817ND

Where to start… so back in High School I had an electronics teacher at Harbor High School named Dan White.  He was a ham and talked about radio in class and gave us demonstrations of how he used radio.  Even before that I used walkie talkies, and later CB Radio. Around that time I received my first scanner (Uniden Bearcat 200XLT) and a short wave radio. I monitored a lot, in every band I could get my hands on.

So I got my ham radio license and bought a dual band handheld, Kenwood TH-D7, and later a tri-band Kenwood TH-F6A and used them both for monitoring and occasionally talking on the VHF bands. But there was always a part of me that wanted to go back to the longer wavelengths and start hearing things from around the world.  I love linked repeaters, but there is some kind of “ham radio purity” to hearing a voice from thousands of miles away without any internet backbone carrying it most of the way.  Direct from his antenna to the ionosphere to my antenna… that’s just cool.

The Radio Choice

I like to research a lot before I make purchasing decisions, and with radio I knew I really needed to determine how I planned on using a radio so I could find the right one.  Knowing I do enjoy listening more often than transmitting, overall power rating wasn’t as important to me for now.  As I start transmitting more, I’m sure I will become more interested in higher power and better antennas, but as a start I was thinking a QRP (Low Power, typically under 5 watts) would do the trick just fine.  The receive quality would be about the same as a more expensive, higher power radio.

I also wanted something portable and that I could easily operate off of battery power.  Ellen and I enjoy hiking and backpacking, we travel frequently and I’d like to be able to bring the radio along and throw an antenna up in a tree and see who was out there.

Having a friend at Elecraft, I first started looking at the Elecraft KX1 ultra portable tranceiver. The thing is tiny, is a kit which I would enjoy building, has paddles and runs off batteries easily.  With upgrades it can operate of four bands and have an antenna tuner build in.  I’ve always been interested in learning morse code (CW) and it seemed like a good option.
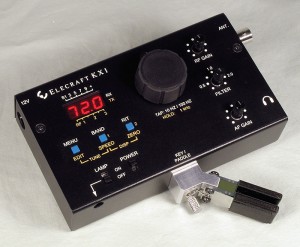
The Elecraft KX1

As I started looking at other radios, I added up the price of the KX1 kit, the modules for the other bands, the antenna tuner, and the paddles… and found I could get a larger radio that also offered phone (voice) operation on more bands for a comparable price.  Some friends on Twitter also recommended a radio with more capability.  Once I learn CW better, I have a feeling I will come back and look at the KX1 again, but this leads me to the radio I actually chose.

The Yaesu FT-817nd

One radio fitting my desires well was the FT817, it was relatively small, could run off of it’s internal batteries or easily be powered by external batteries.  It covered the 2M and 70cm bands so I could use it on VHF without having to carry another radio.  It covered 160 meters through 6 meters, had wide band receive, and could be computer controlled and programmed. It would allow me to use the digital modes which I’ve been interested in (PSK-31, RTTY) as well as CW.
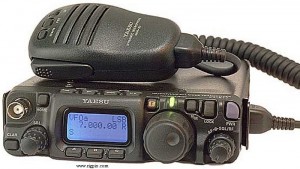
Yaesu FT-817ND

So I debated for quite a while if I really wanted to spend the money on a new radio or not, plus I started looking at all of the accessories I would want or need if I got it.  But after a few months, and with Christmas coming, I started the groundwork on making it happen.  My wife was going to help out and give it to me for Christmas.  I had won a F6A at Pacificon in the raffle which I sold on eBay, so between that money and her portion of the gift it would be just perfect.

Accesories: The Elecraft T1 Antenna Tuner

The first accessory I ordered was the Elecraft T1 Antenna Tuner kit. It is a tuner that will work with any QRP HF radio, but was built with the FT-817 in mind.  It has a cable that connects between the tuner and the radio and will retune based on which band you have set up in the 817 without the need of transmitting and retuning.
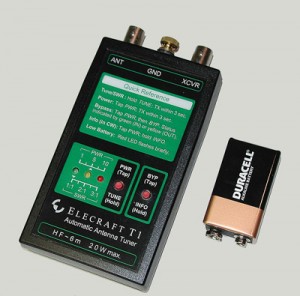
elecraft T1 Antenna Tuner

The kit was great, I had a rainy Saturday morning and put it together through the day. Had no radio to test it with yet, but all the lights blinked the way they were supposed to according to the manual.  I did buy the radio cable with it just for ease of tuning as I jumped all over the bands when I would simply be monitoring but not transmitting. I was new enough to HF that I really didn’t know what bands would be interesting or useful to me, that was yet another reason I opted to go with this radio instead of the KX1 to start with.

Accesories: The DinKey

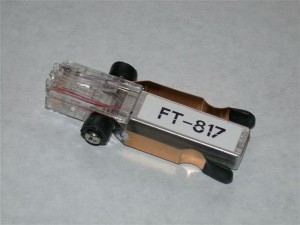
Knowing I really wanted to continue learning CW (Morse Code) I knew I was going to need a key or paddles.  I was shopping around eBay and various websites and found what I believe is the perfect solution for this radio! The DinKey is tiny, it plugs right in to the microphone jack and works with the radios internal electronic keyer.
dinkey012

I received it quickly from the manufacturer and am extremely pleased with it.  I just turned on the practice keyer and it felt great and I was easily able to send code as fast as I knew how… I won’t mention how poor my accuracy was but that has nothing to do with this excellent little product, and the price was perfect.

Accessories: The Antennas

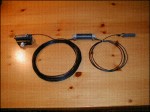
So I was going to need an antenna… since I already had the Elecraft T1 Tuner, I only needed a random wire to do the trick. For portable operation having something that was end fed seemed an ideal instead of a typical dipole antenna.  I knew I would end up building several antennas, but during my search I came across the PAR Electronics END-FEDZ Antennas. Looking at those, I went ahead and decided to spend the money and order one of their EF-10-20-40 meter antennas.  They don’t need a tuner, looked like they were very high quality, and had great reviews on the ham radio websites.  I have not yet received it, but am looking forward to it.
PAR Electronics END-FEDZ ef10-20-40

Since it was after Christmas and I already had the radio, I needed an antenna to play with right away so I jumped online and did some reasearch to see what kinds of wire I should try and what length would be most useful. I found this post on the Elecraft email list that had a list of antenna lengths that would be most useful on multiple bands.  So I headed up to Radio shack and bought the supplies to build an antenna.

I’m a beginner here and did most of this on my own without following an example online, so I’m not saying this is a good or right way to do it, it’s just what I did for my first attempt.  I decided to go with the 49.2 foot long length, so I picked up a spool of 60-Ft. UL-Recognized Hookup Wire (20AWG) and a UHF-to-Motorola-Type Scanner Adapter. What I did was measure out my 49.2 feet of wire, stripped one end the same length as the motorola connector that was visible.  I slipped on three pieces of heat shrink tubing on to the wire, then did a nice long solder connection of the antenna wire to the adapter. I slipped down the smallest heat-shrink tubing and shrunk it in to place.  Brought down the next smallest one and shrunk it over the first one.  Then the last piece was just big enough to fit over the outside of the Motorola connector, so I shrunk it down over that and it connected tightly to the two previes pieces making a nice seal.

For the end, I didn’t want to tie any knots or build something complicated at the end, I wanted the antenna wire portion as straight and unmodified as possible.  So I simply too a few inches of the remaining antenna wire, bent it in to a U shape, and used heat shrink to attach it to the antenna leaving a loop of insulated wire exposed at the end.  Now I can tie it to a line and pull it up in to a tree as needed.

The antenna has worked just fine for me thus far, I have nothing to compare it to, but with the antenna tuner it seems to tune up just fine almost everywhere I have tried listening.

This post has gotten rather long, I’ve been meaning to sit down and write each step of the process but just never had the time, so now you get everything all in one post.  If you have any questions feel free to add them to the comments.  I’m new to all of this but I’ll be glad to tell you what I know.  In the near future I expect I’ll have some more posts and questions as I listen more to HF, play with PSK-31, continue learning Morse Code, study for my General Class license and eventually make my first DX contacts on HF!
Electronics Flea Market and Inline Amplifiers

On Saturday morning I headed over to the monthly Electronics Flea Market over at the De Anza College parking lot.  My main reason for going was to pick up a few more of the $1 LED Keychain flashlights I got there a few months back, mine broke and Ellen wanted one.  Of course I wanted to check out the other “toys” there as well!

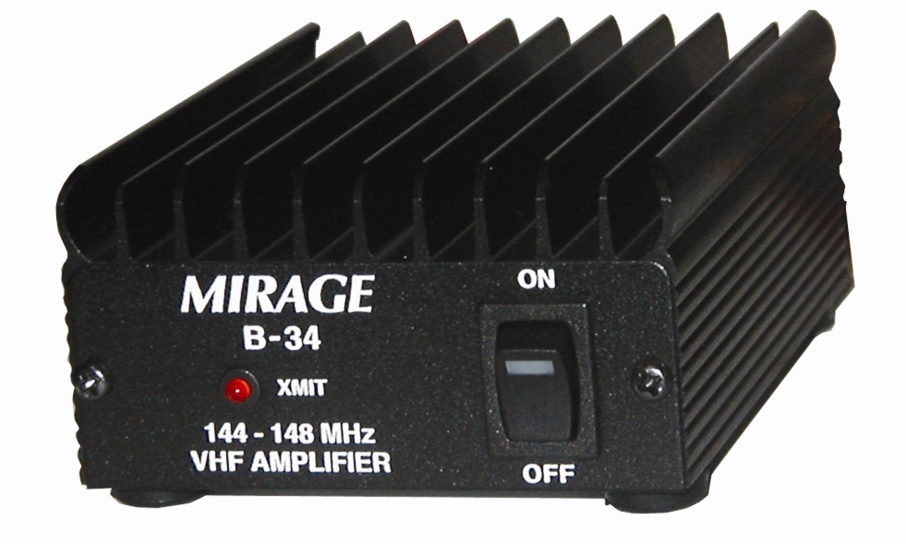
On the last row just as I was getting ready to leave I saw a brand new Mirage B-34 linear power amplifier sitting on a table.  They are hooked up in-line between a 5 watt handheld radio and the antenna, boosting the signal output up to 35 watts.  I’d never used one, but I know I could definitely benefit from some additional power.  Thought about buying it, the price was $40, then wandered away.

Before leaving, I pulled out my iPhone and checked Google and eBay for the prices of these things… saw prices ranging from $89-$120 for them, so $40 was a great deal, figured I could just sell it and make a profit.

Well, as soon as I got home I quickly talked myself in to at least “trying it out” which led to a long afternoon of playing with cables, connectors, and soldering irons.  I checked the max power consumption of my cigarette lighter adaptor for the car, saw it was good enough, so I soldered a lighter adaptor to the power cables on it.  Bought an antenna cable at radio shack, cut off the end, and soldered on another PL-259 to the end of it and got everything running.

I pulled out my second HT so I could test the audio differences with it on and off, and quickly learned about desensing a receiver… The HT would hear the “roger beep” style tone of the repeater, but I couldn’t hear the audio of my own transmission at all.  I even separated it from the antenna a ways and had it recording on my laptop so I could review the audio later, but still wasn’t able to get much.

It wasn’t until tonight when I was talking with Craig, W6WL, and he told me it was definitely just desensitizing the receiver, and after a quick test with him we proved both radios really were transmitting properly.  Sitting in my driveway with my mag-mount antenna he said he could receive me about 70% signal.  Then I flipped on the 35 watt amplifier and he said he could hear me at 104% hehe.  We chatted for a bit and my signal was quite strong to him, so long story short, I’m very pleased with my purchase!

In addition to that, while I was working on getting that wired up, I also did some additionall installation to get my RTrack APRS tracker wired up in a more permanent installation.  I’ve got it running to my old hershy kiss mag mount antenna.  We’ll see how often I make it to a digipeater now, and if I don’t get great results, I may toss the 35W amp inline for that transmitter for a little while and see if that brings about great improvement.

The tracker of course was primarily for the airplane, and I think the lower power of the unit will work just great.  Driving around this mountainous tree filled area with a small antenna some extra wattage might be beneficial!

Commercial use of Family Radio Service (FRS) Frequncies

FRS RadioI work for a non-profit organization and over the years I have spotted more and more of our staff groups using Family Radio Service (FRS) radios as a part of their jobs. While I knew it is an unlicensed band, I also assumed that business use would have been prohibited since it was called the “Family” radio service.

I inquired with two of our staff who probably authorized their purchase and use to see if they knew the legalities of it, and both admitted they were not absolutely sure if it was legal or not, but also commented on the truth that they are such short range devices it probably would not cause any harmful interference to any other users of the frequencies.

I decided to do a few minutes of research which I shared with them, and now I also share with you in case your might also be interested.  The short story is… yes, it’s legal. 

The longer version follows:

The last sentence of the FCC introductory paragraph on the service is of most interest to us in this case:

Family Radio Service (FRS) is one of the Citizens Band Radio Services. It is used by family, friends and associates to communicate within a neighborhood and while on group outings and has a communications range of less than one mile. You can not make a telephone call with an FRS unit. You may use your FRS unit for business-related communications.http://wireless.fcc.gov/services/index.htm?job=service_home&id=family

It does appear in 2002 that a petitionReleased by the FCC as RM-8499 in WT Docket No. 95-102 to amend Part 95 of the FCC’s rules, ITA’s petition specifically seeks to prohibit daily business communications on FRS frequencies. was given to the FCC by the ITASource: http://mrtmag.com/business/industrial/radio_exclude_business_family/ requesting business use be prohibited from the frequencies, but with quick review of the FCC comments on that petition it looks like they dismissed it as a money-making attempt by business band radio manufacturers :-)

So for businesses who do use FRS as a part of their day-to-day operations I would just recommend always keeping in mind that this is shared radio spectrum, and if ever our use interferes with anyone else’s use of the frequency we need to be willing to move and not assert any “rights” to those channels. Personally I believe that if push ever came to shove, I think families and occasional users have more right to “family” spectrum than do businesses, but currently it is completely legal to use it.

My only other brief comment is that if you ever create an emergency communication plan or disaster plan, I recommend including FRS Channel 1 with Privacy Code 0 (no tone transmitted) as that frequency to be used for staff responding to such an emergency.

Channel 1 is casually recognized across the country as the emergency frequencyhttp://www.f-r-s.org/inside/homepage.htm, and turning off all privacy tones ensures more radios from various manufacturers would actually be able to communicate with each other since the tones selected don’t always match across brands.

If you have any additional information or correction to this post, please let me know in the comments, I’d be glad to update my text with any details you may point out.

Self-contained APRS Tracker Comparisons

I’ve intended to do some comparisons between the APRS Tracker (Automatic Position Reporting System) options out there to decide which one I might purchase and use. APRS combines GPS receivers with ham radio transmitters to allow the user to broadcast their current speed, position, and altitude via radio. Other users receive those location packets and place them on the internet for easy mapping and data collection.

My primary uses would be for tracking my car and aircraft, as well as possible use for hiking, mountain bike riding, etc. Some day down the road it might be integrated in to high altitude balloons or radio controlled aircraft, etc.

So for most all of those applications, small size, light weight, low power consumption, and a simple package are the preferences. Currently I use a Kenwood TH-D7 with a Garmin GPS III+ when I need to do APRS. That ends up being a mess of wires by the time I’m done… so I’m hoping for something simpler, and preferably with a dedicated frequency agile 2M radio.

RPC Electronics RTrack APRS Tracker

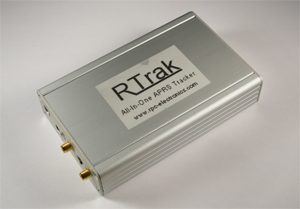
The device that got me started on this search was seeing the recent release of the RPC Electronics RTrack tracker. Small size, good looking package, built in radio, programmable to have different profiles, smart beaconing, etc. This unit includes the 500mW Frequency Agile 2M transmitter, APRS Modem, and GPS, all for a price of $250 plus shipping.

Byonics MicroTrack 300 APRS Tracker

Next would be the Byonics MicroTrak devices. They have versions from 300 mW up to 10 Watts. Nice to have some options there! For aircraft use, I think the 300 mW would be just fine, but even with my TH-D7 putting out 5W, I know my APRS coverage in the car is pretty poor in my area, even with an external antenna. So maybe I should go with a higher power unit. Once of the nice things is you can add an amplifier to their lower power versions if you change your mind later. The costs for these vary between $105-$180 for the pre-built versions.

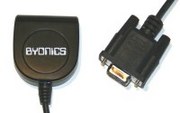
Byonics GPS2

And with all of those, you’d need to add a GPS to the package such as the Byonics GPS1 or Byonics GPS2 for $56 or $69 respectively. So this places the least expensive operational unit at $161, and the range of units from $161-249.

For all of the units I’m initially comparing, I’m not yet looking at if they need antennas, extra power supplies or voltage regulators, batteries, etc. The MicroTrak does offer as an option a voltage regulator, the Micro-Volt 12 that will run from 12-24 volts, so that would be great for car and aircraft use.

I’m going to re-visit this post as I look further in to things, so check back here for updates. But at first glance… I like the simplicity and “sealed package” of the RTrack, everything is in the box. But if I built a box for the Byonics system, for approximately the same price I could have the option of 10 Watts. So it looks like I need to look further in to the differences between the TinyTrak3 features and the OpenTracker 1+ software and options. If I built a box for the Byonics I could include room for batteries.

Update 12/5/08

As I was checking out self contained trackers again recently I spotted a new option on the market.  It is the Byonics Micro-Track AIO (All In One).  It offers a transmit power of up to 10 watts, a built in GPS, and room for AA batteries right inside the box. This means you get more transmit power, and no need for external batteries.  Looks like a nice option and I’ll keep my eye on it in the future.

Playing with the Arduino

For months I’d been seeing pictures and reading stories about the Arduino, the short description from their website is:

What is Arduino?

Arduino is an open-source electronics prototyping platform based on flexible, easy-to-use hardware and software. It’s intended for artists, designers, hobbyists, and anyone interested in creating interactive objects or environments.

So before Christmas, Ellen and I were talking about gift ideas for each other and I went ahead and let her know that the Arduino was something I was interested in. She was willing to let me open it early, but I waited until Christmas anyways which gave me plenty of time to research it further online.

I have been really impressed by the platform, and by the programming interface to it. The software comes in Mac, Linux and Windows flavors so that covers just about everyone who would want to try it out. I ordered the Adafruit Proto Shield from Adafruit Industries. Since I bought that as a kit, I had to dig out my soldering iron and refresh my skills a bit.

In preparation for that, I’d recently completed building a MintyBoost kit from from ladyada.net. The MintyBoost is a battery charger for USB devices that runs off of two AA batteries. When I went to MacWord this year, I’d played with my iPhone in the car all the way up and ran the battery dead, so that helped convince me that having an external charger for it that ran off of batteries would be a nice thing to have.

But back to the Arduino… my first step was running through the tutorials over at ladyada site. They were really well put together and take you from the “Hello World” of physical computing, the blinking LED, through the use of switches and more advanced programming and logic.

My first sketches were just blinking LED’s at different speeds. Then I made an LED “breathe” like a sleeping Macintosh. Then I added in a switch and would make it blink or breathe. Played around with digital and analog inputs, tried out some sending and receiving of IR signals. One of the fun ones I did there involved pointing any IR remote control at the arduino to toggle an LED on and off again.

arduino_alarm.jpg

Other silly sketches were variations on the Night Rider light bar, I programmed one from scratch, then found better examples online that were smoother in appearance. I’d seen people trying POV or Persistence of Vision projects, so I downloaded a sketch and had it say Ellen’s name as you waved it back and forth in a dark room Won me some points with the wife there ;-)

I’ve played with RGB LED’s making them fade in to all the various colors, worked with a 7 segment LED to count from 0 to 9, worked with sending and receiving serial data via the USB port, started working on building a VU Meter (to be used for audio levels, lighting levels, water temperature, etc)

I keep planning on taking pictures, posting code snippets, etc, but I figure it might be better to get in the habit of posting anything and working on the details later. If you want to see any of the source for any items listed here, just let me know. More to come soon.